
How to Make a GForm
As most of us know, Google has a lot of Free Tools that are useful, intuitive and easy to use!
If you’re anything like me, you probably haven’t even used half of what they offer and mostly use the basics i.e. Google Drive, GMail, Google Docs and Google Maps.
However, late last year, I was shown how to use another one of these Google Tools/Apps called Google Forms.
There, you can quickly and easily create and share Forms or Surveys to your Clients, Employees, Team etc, and analyse their ‘real time’ responses as they come in.
In this article I will give you easy to follow instructions on how to create your own Google Form.
To start off, you need to either:
- Sign In to your existing Google Account
OR - Create a New Google Account
HOW TO MAKE A GOOGLE FORM
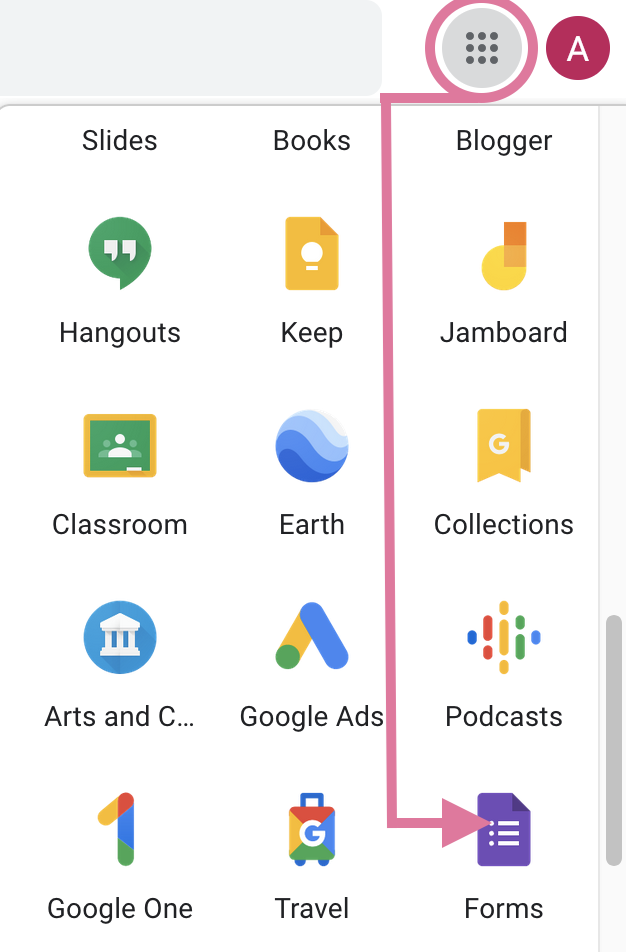
1. Go to Google Forms
Normally, I would select Forms from the Google Apps Menu (shown below)
(However, you’ll need to scroll almost to the bottom)
But alternatively, you can either:
- Go through Google Drive and create a new Form there
- Go through Google Sheets to create a new Form
- Click here to go directly to the GForms page!
2. You will arrive at the Google Forms Home Page.
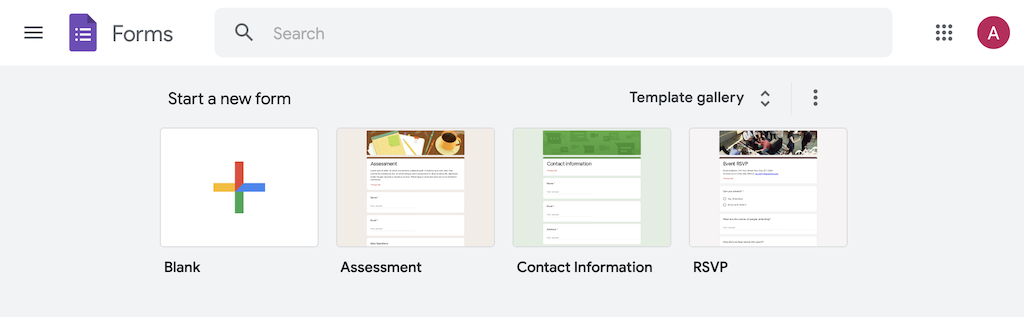
If you want a completely customised Form, choose the Blank Form option, otherwise you can choose from 3 main Categories:
- Personal Forms:
– Contact Information
– Find a Time
– RSVP
– Party Invite
– T-Shirt Sign Up
– Event Registration
- Work Forms:
– Event Feedback
– Order Form
– Job Application
– Time Off Request
– Work Request
– Customer Feedback
- Educational Forms:
– Exit Ticket
– Assessment
– Worksheet
– Course Evaluation
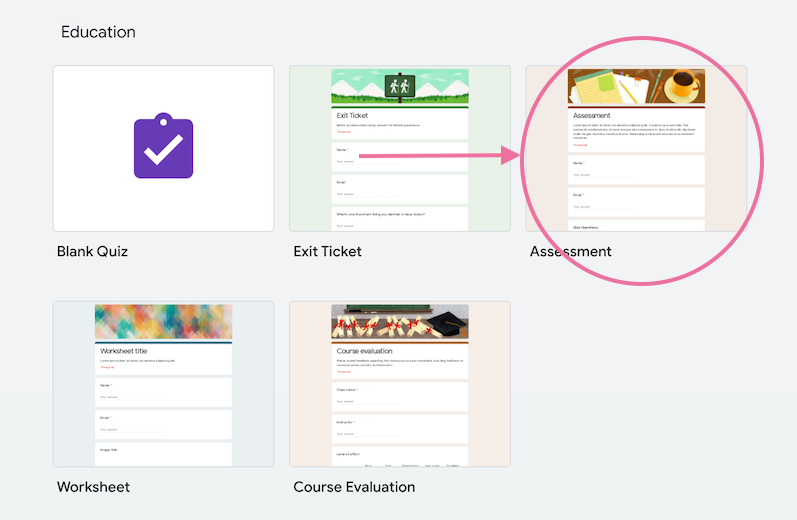
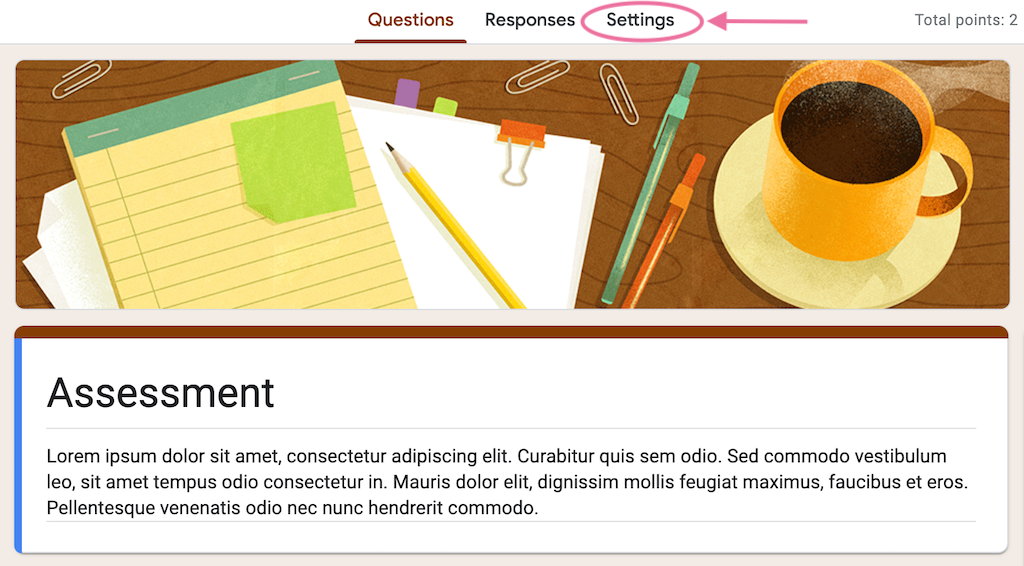
3. Choose your Template.
For this example, I’ll be using the Assessment Template, found under the Education Forms:

4. Write a small description of the Form underneath the Google Form title.
5. Input your Information/Questions into your Google Form.
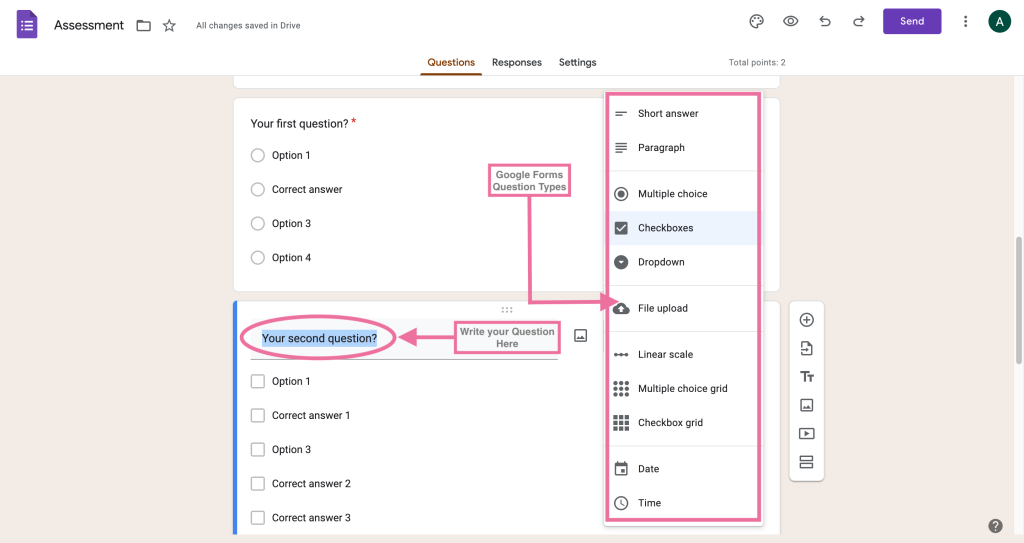
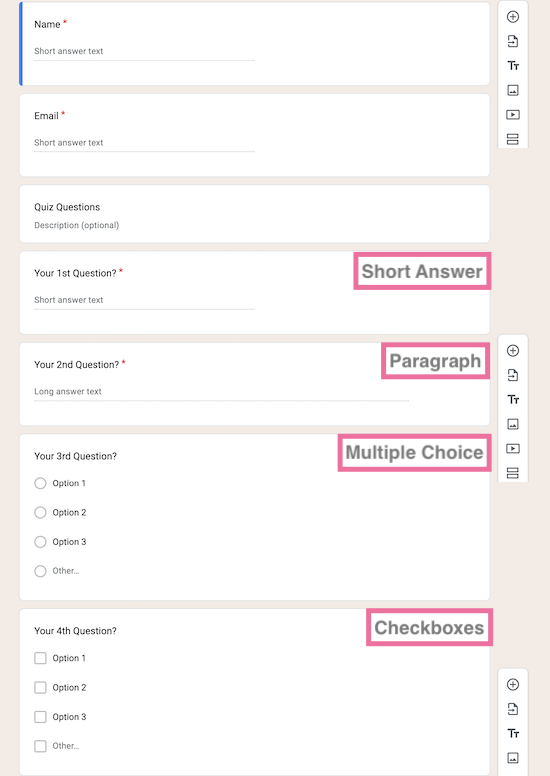
6. Write your first Question/Statement & Select your ‘Answer’ Format
Writing your Questions/Statements on Google Forms is super easy and there are several different options for how you can get people to answer your questions.
- Short Answer
- Paragraph
- Multiple Choice
- Checkboxes
- Dropdowns
- File Upload
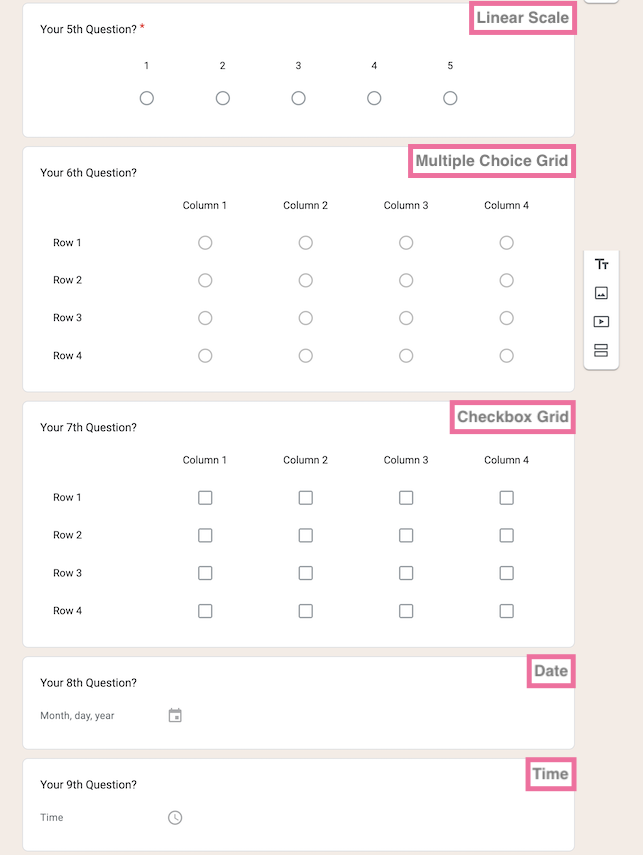
- Linear Scale
- Multiple Choice Grid
- Checkbox Grid
- Date
- Time
Here is what the various Answer Formats look like on a Google Form:
The small right hand side bar has:
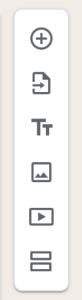
Add a Question
Import Questions
Add Title & Description
Add Image
Add Video
Add Section
7. Once you’ve put all of your Content onto your new Google Form, it’s time to look at the Form Settings and alter them if necessary.
From here you can customise your GForms so they perform exactly how you want.
You have many options once you are in Settings, shown below:
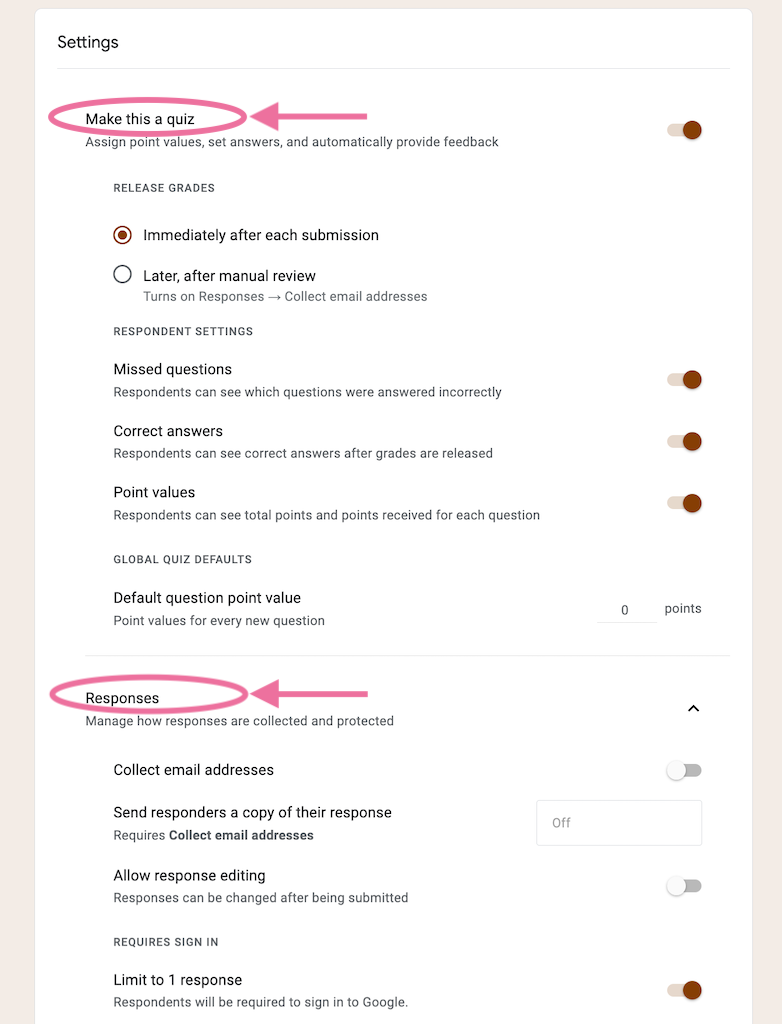
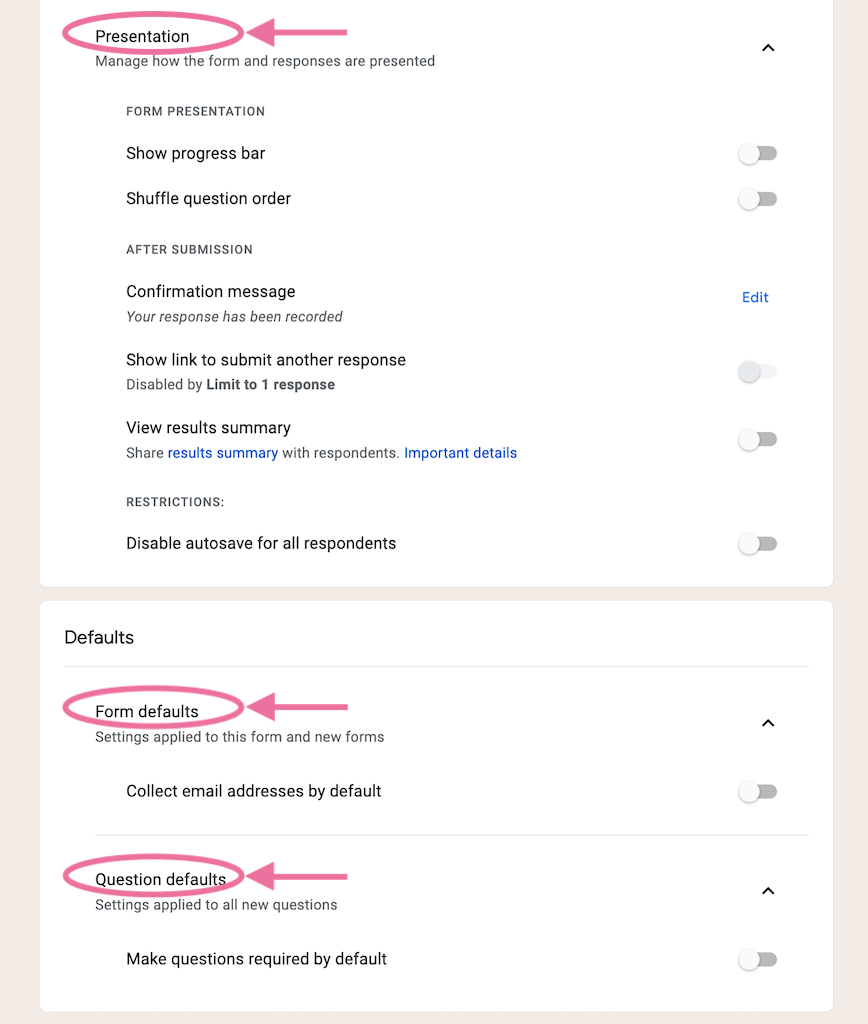
If it’s your first time making a GForm, I would have a scroll through and read all of your options, so you can see how much is offered with this App.
8. When you are happy with your Google Form, share it by clicking the Send Button.
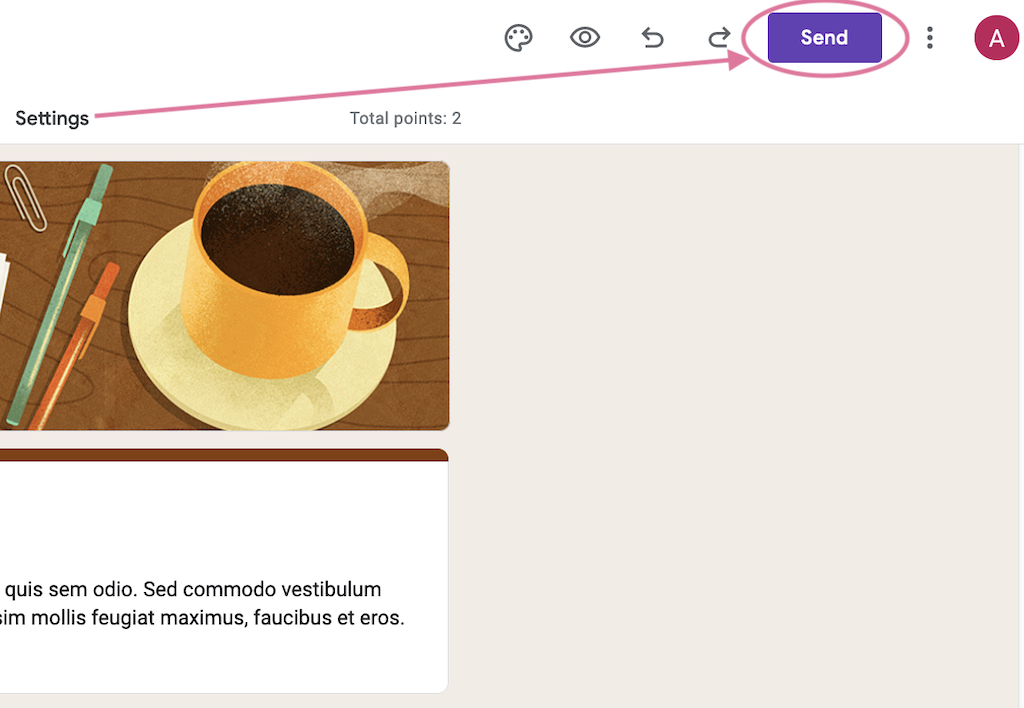
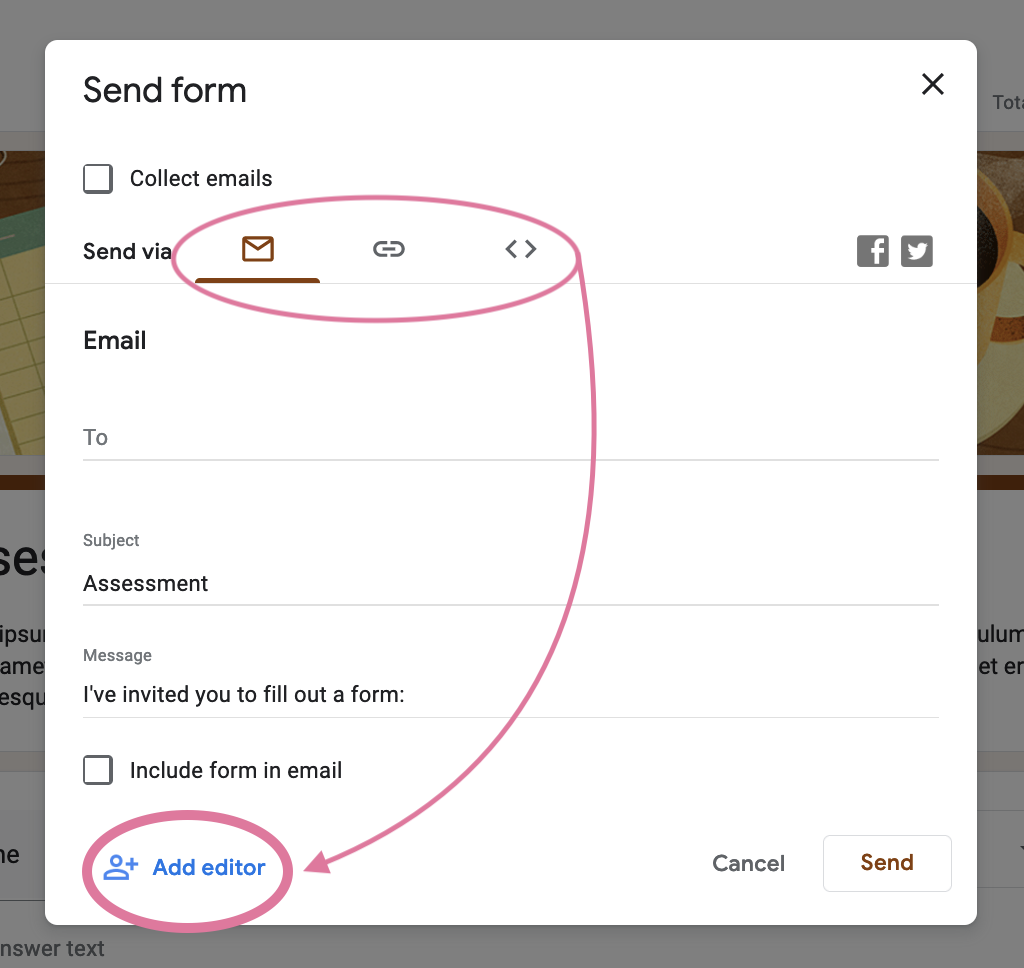
You have the option to send it your contacts via Email, Link or your can Embed the Form on a website.
Before you send it, I would recommend having a look ‘Add Editor’ as it allow others to View and Edit your Google Form, select that option if necessary!
Creating your own Google Forms is very easy!
You can access and edit your Forms by going into your Google Drive or visiting the Google Form Page directly.
If you want more information about Google Forms, this article by Google Support tells you how to use and create a New Form and this is the Google Forms About Page.
Don’t have enough time to do make a GForm yourself? I can do it for you easily using your own content to populate the Google Form.
Contact me today to get started!